Simulate Multiple Lights Using Only One Light
There's a lot of photographers obsessed with gear. A lot. This can apply to anything, including having an arsenal of lighting equipment on hand to craft some amazing images. While having loads of options is always nice to have, sometimes all of that hassle isn't even necessary. Don't get me wrong, I too have an arsenal of lighting gear with a constant thirst for more. Sometimes, though, people can let their gear lust hold them back from creating something beautiful just because they "don't have enough lights". Sometimes this may well true, but I want to show you a way to simulate the look of having a multi-light setup using a single, creatively placed light.

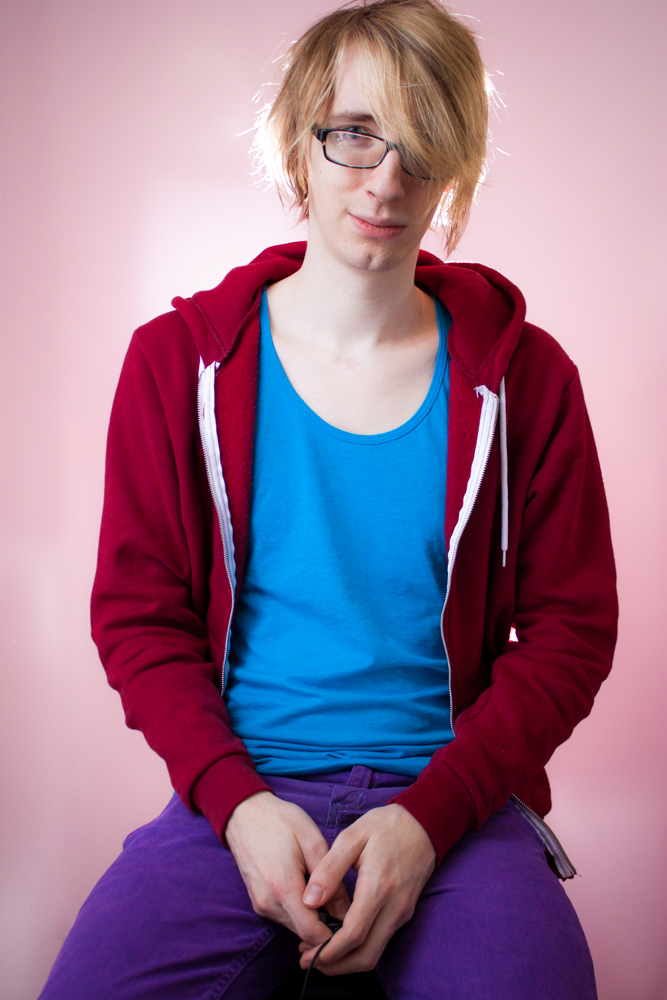
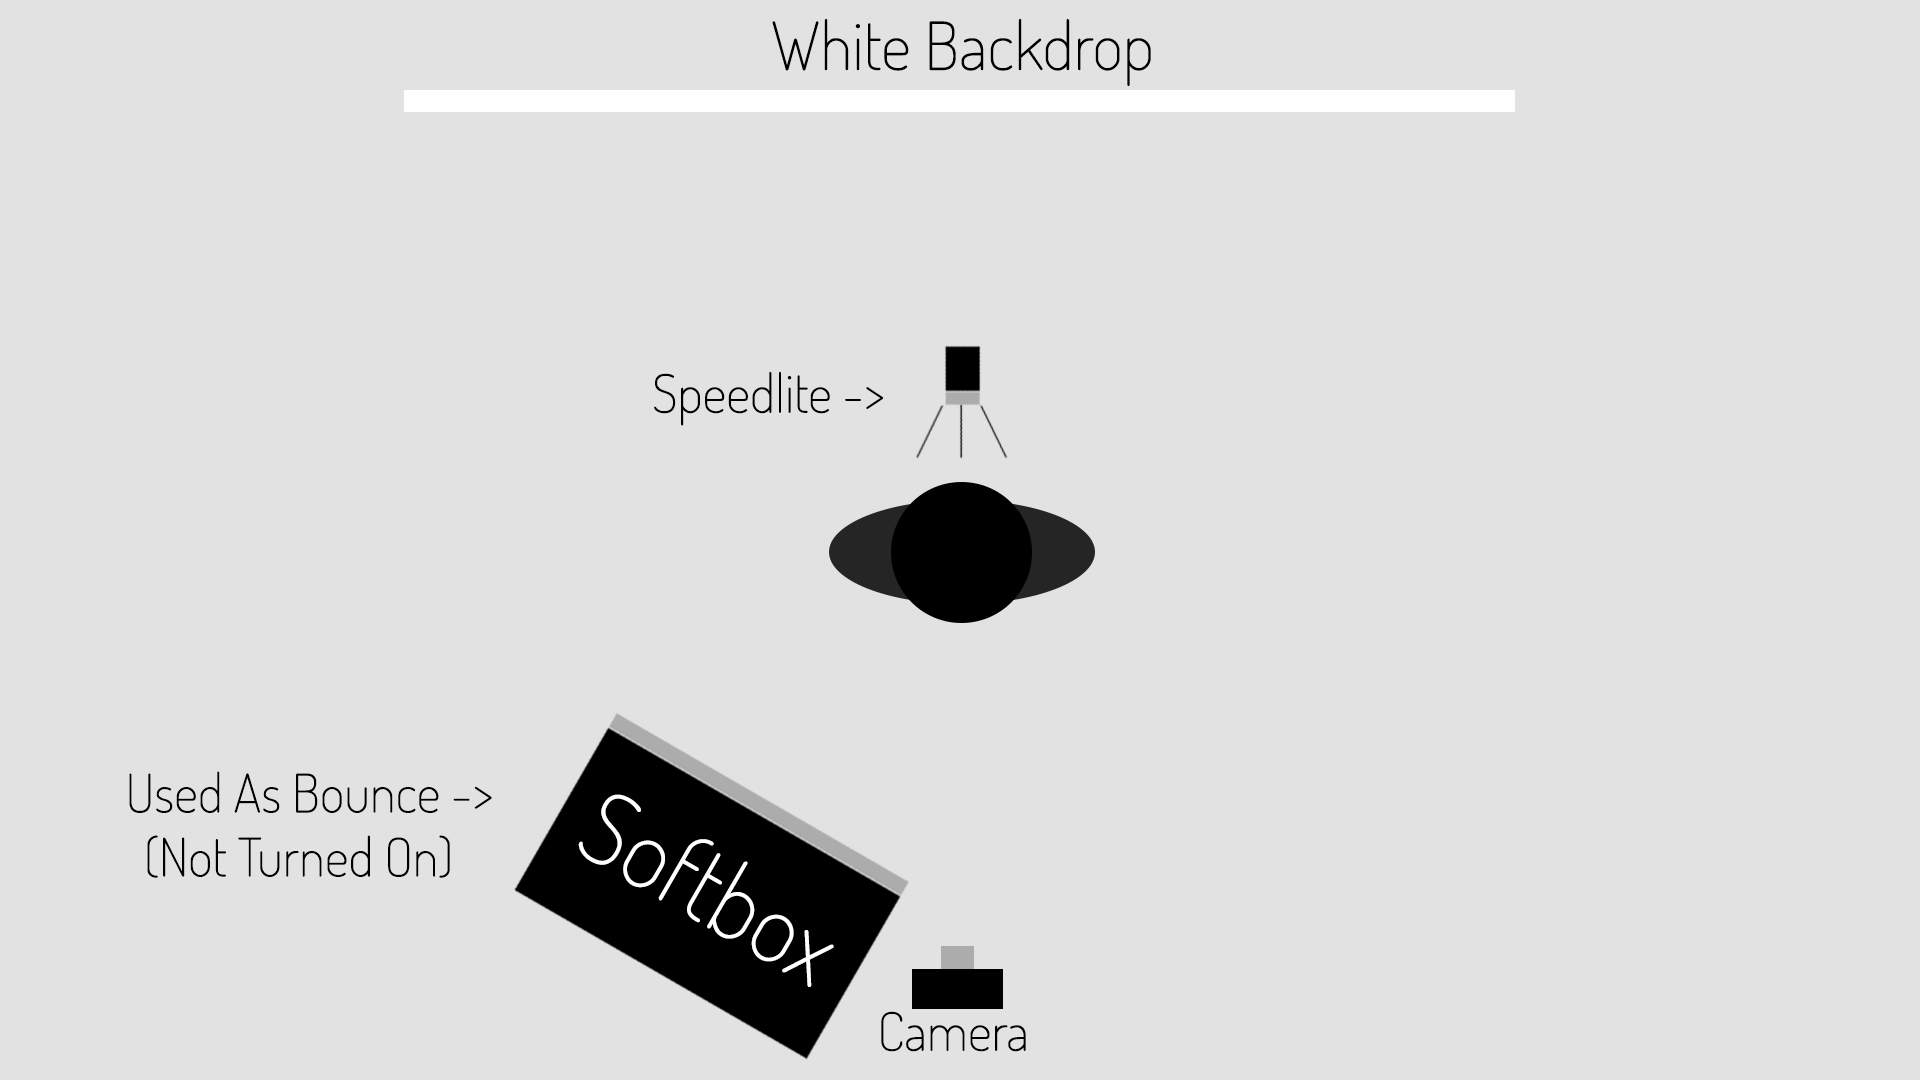
This photo is very simple. While at first glance it may appear to have a main light, rim light and gelled background light, you'd actually be wrong in your assumptions. The only light affecting the scene here is a speedlite placed directly behind me, about six inches or so, hidden out of sight from the camera. When the flash fires, the light hits the back of my hoodie and then bounces backward onto the white backdrop behind me. Since my hoodie is red, when the light hits the background it gains a light red (pink) tint to it. This creates the look of a gelled background light colored light red. With the backdrop having a glossy finish, the light gets reflected even more than if it had a matte finish instead.
Some of the light passes through my hair as it goes over my shoulders, creating a subtle rim light effect. For the "main light" portion, the light that travels over my shoulders hits a bounce that I placed right in front of me which reflects light back onto my body at the angle in which it's positioned. This "bounce" is actually just a two foot by three foot softbox, although you can use literally anything white as a bounce. The white (or silver) side of a reflector, a big white piece of cardboard, a white wall, an assistant wearing all white, so many different options here to get a similar effect. The important part is making sure whatever you use as a bounce is positioned somewhere where the light is actually going to hit it.
You can actually see the reflection of my bounce in the photo because of how glossy the finish of the background is. Not only that, but the bounce also creates a subtle catch light in my eye which is always a plus. The key to getting a properly balanced exposure between all of the different "lights" is having the distances between me and the bounce and me and the background be roughly the same. I'm also sitting fairly close to both of these, about 2.5 to 3 feet away, so I don't loose too much light and have to bump my ISO up insane amounts as a result.
This is a relatively simple photo here, but you could just as easily make it as complex as you need to. With creative placement of the light, bounces and environments, you can come up with a myriad of lighting setups. One of the great things about trying this out for yourself isn't just if you're broke and can't afford lights, but also a fantastic way to force yourself to think more creatively. Placing restrictions like these on yourself (not on the job of course) can even help you when using multiple lights. It's a great way to develop a mindset of only using what is necessary instead of overcompensating by adding more lights to the problem. Like I said earlier, you may actually need to use ten different lights, but sometimes we fool ourselves into believing we need ten lights in the scene when we actually might only need a few well-placed lights to get the job done.
Side note, not only does this work for photos but also in video as well. This could be a very lightweight way of lighting something like an interview. Not only that but using this setup makes your clients think you're a goddamn wizard. Don't let anyone tell you otherwise ;). If you've got any tips or advice for anyone who may be reading, let me know in the comments below. This is a journey for me as well and I love learning new and inventive ways of approaching a technique that I haven't thought of before.
Learn. Create. Experience. Share.