
Multiplicity Cloning Tutorial

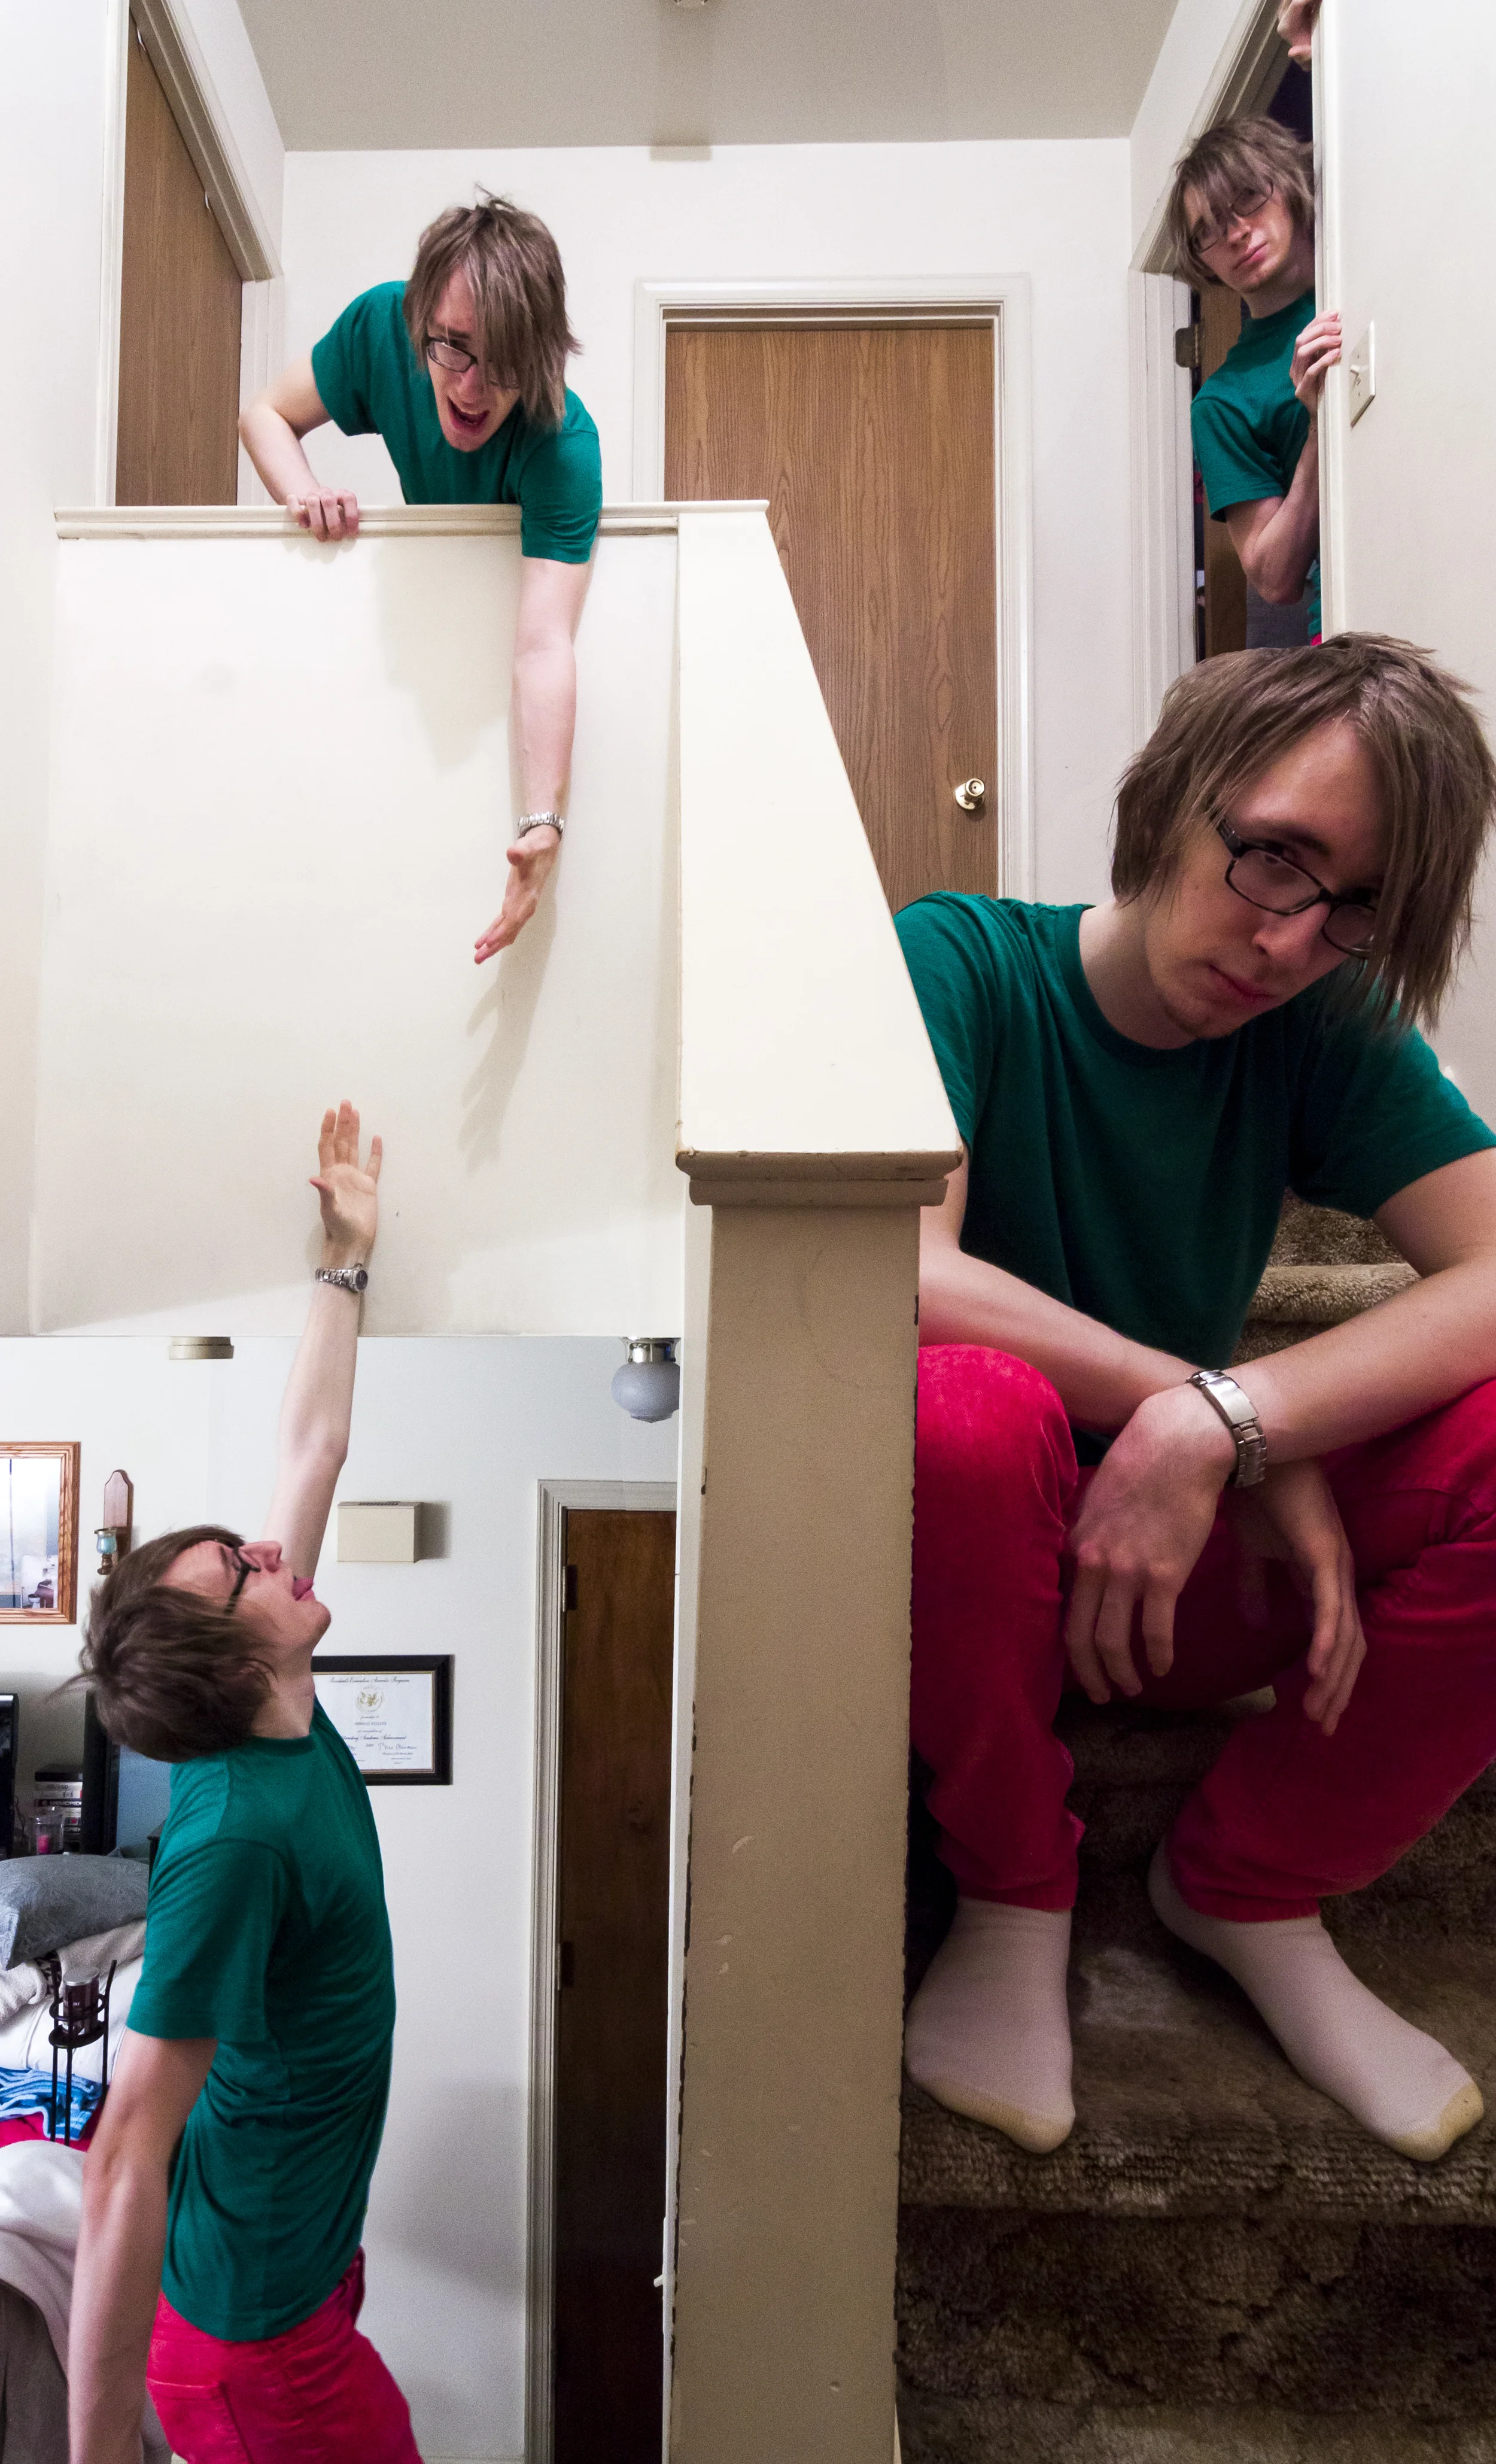
If you follow me on Facebook, you may have seen a clone photo I put up right before christmas. It wasn't meant to be the most amazingly intricate and well composed photo in the world, just something fun to do while I was bored during the holidays. When I was making it, I forgot how fun they are to shoot. I used to make them all of the time years ago and the concept of cloning myself kind of fell to the wayside while I was working on learning new techniques. After I posted it online though, I remembered another thing about multiplicity photos. There's a lot of people who love them and a lot of people who still aren't sure how to make them for themselves. So, I decided to make a tutorial explaining how to not only set up the shots to make your life easier, but also how to composite them in post to get the final image.
When setting up your camera in the first place, there are a couple of things you should pay attention to. The first thing I would suggest you do is to put your camera into manual mode. This helps you by keeping your settings consistent between each shot that you take. If you set the aperture, ISO and shutter speed for the first shot and leave those exact settings for each subsequent shot, then each shot that you take should have a consistent exposure. This is really key when you take your photos into photoshop. If your exposures were all over the place, then it would be a lot harder and take more time to make it look good after the fact. I don't know about you, but I'd rather spend less time in post.
Next, I would suggest using a tripod to not only stabilize your shot, but also to make sure your camera doesn't move in between shots. If that were to happen, not only would your subject change, but your scene would also change slightly which makes the editing process that much more tedious. I show you more tips, like using an intervalometer, and how to composite everything together in the video below. I think it's much more important to have a visual representation of what you're trying to do instead of me just writing all of the steps out here, so I hope my video helps you out. The photoshop portion starts at 3:44 if you'd like to skip the tips section (although I'd advise against that =P). If you have any other tips or techniques that you'd like to share that I don't go over in the video, then feel free to leave a comment below. I love teaching and learning new things at the same time. ^_^