
Search For Even More Content!
My life has changed significantly in the last half decade I’ve been absent. Five years ago my life consisted of traveling all around and documenting my experiences, writing educational content for websites and magazines, writing and filming informational videos related to creativity and photography, shooting weddings and conceptual portraits with models, and working on a myriad of projects to fill up my remaining waking time. But then, something changed.

There's a lot of photographers obsessed with gear. A lot. This can apply to anything, including having an arsenal of lighting equipment on hand to craft some amazing images. While having loads of options is always nice to have, sometimes all of that hassle isn't even necessary. Don't get me wrong, I too have an arsenal of lighting gear with a constant thirst for more. Sometimes, though, people can let their gear lust hold them back from creating something beautiful just because they "don't have enough lights". Sometimes this may well true, but I want to show you a way to simulate the look of having a multi-light setup using a single, creatively placed light...
I came up with this idea a few years ago when I was trying to find a reflective backdrop for my still life and product photos. Of course, later on, I eventually found out that other people had come up with the same idea as I had. At the time, I was looking for something that would add some fantastic bokeh without reflecting the candles I had placed in the scene. I searched throughout my house and found some aluminum foil that ended up working perfectly. I never had the realization until relatively recently that I could create a much larger version for portraits...

As I'm prone to do, I was messing around while trying to find a new technique I could add to my photography repertoire. The thought occurred to me while I was shooting through some colored lights that I could alter this slightly and fake the look of something like expired film. So I set out to figure out how to do that and make it look believable. I don't know if it's believable or not, I'll let you be the judge of that, but I did find a way to accomplish simulating the look without using any filters, photoshop or any kind of post processing whatsoever...

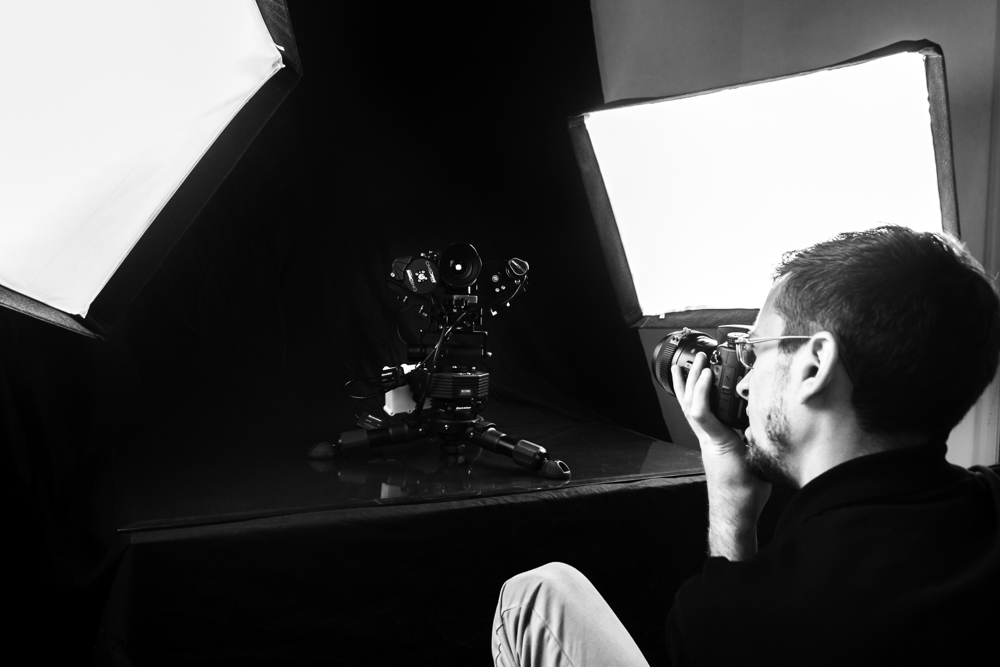
This is going to be a long read. Grab a cup of your beverage of choice and relax as I explain how I shot 30 photos with different lighting setups. I've got lighting diagrams, ideas for alternatives and some food for thought that will hopefully get you thinking about lighting in ways that you may not have thought of in the past. I really wanted to hone in on the lighting with these photos, so no fancy concepts (usually) and just a simple black backdrop to make the lighting the main focus. I limited myself to no more than three lights max so you don't need a huge studio with a million lights to try these out for yourselves. So without further ado, let's get started with photo number one...

Clamshell lighting is one of those lighting techniques that should be a staple in every photographer's lighting repertoire. It's a classic lighting setup that offers gorgeous lighting for all kinds of portraits from beauty to corporate headshots. It's actually very simple to do as well. All you need is a soft light pointed down on your subject for your main light and some kind of bounce to fill in the shadows from below...

I've been feeling kind of stuck recently with how I how subjects. I guess stuck isn't necessarily the right word. You know how people usually have a few go-to food choices and they rarely ever stray from those? That's how I've been feeling with my portrait lighting. Every photographer has a few lighting setups that they use which they know will work if all else fails. I feel like I've been relying on these choices like a crutch. It's not that I don't know other lighting techniques, I know more than I'd ever need, it's more a feeling of a lack of creativity...

I wanted to share something with you guys about a recent realization I had. Did you know that learning photography could actually make you better at other art forms? It wasn't something I've ever really considered in the past, but it makes total sense to me now. I've recently picked drawing back up again after having stopped for some reason a few years ago. I'm not quite sure why I ever did stop. In fact, I'm not even sure what made me want to pick up a pencil again in the first place, but I'm glad that I have...

I know what you're thinking already, "D.J., what does an office chair have to do with photography?". Well here's the thing, it actually has a lot to do with photographers (along with other creative types) who sit at a desk for a big portion of their day. As a photographer, you spend a lot of time editing and emailing clients at your desk. It would be beneficial for you to have a nice chair to sit on. I actually ended up going with a yoga ball as my new office chair for a couple of reasons that I think pertain to the creative type specifically...

Fourth of July is coming up, depending on when you read this I suppose, and one of the mainstays of this holiday is the fireworks display. Even if you're reading this and July 4th has already come to pass, there's probably another holiday or event coming up where fireworks are involved. I've had various people in the past ask me how to take kick ass fireworks photos, so I figured I'd make a video tutorial showing you how. Don't worry, if you don't feel like watching the video, then keep on reading :) ...
So a while ago, I was on a quest to find an alternative to gels that I could use for my constant lights. Gels are such a great way to add a little creativity in the form of special effects to your photo shoots. The problem with these lights I have is, while they work amazingly, there's not really an easy way to attach a gel to them. The easiest way that I could find is to attach them to the actual modifier I'm using. The thing is though, getting gels to fit a 3 foot plus soft box is crazy expensive. So I decided to find a way to create a gelled effect without breaking the bank...

Have you ever wanted to delete a photo from inside of Lightroom, but accidentally "remove" the photo instead? It's actually much easier to slip up on than you might imagine. When you go to delete a photo from your Lightroom library, theres a prompt that pops up asking if you want to delete the photo from disk (in other words your hard drive) or just remove it from your Lightroom catalog. The problem is that the default option here is to remove it from your catalog, so if you're button happy like me, then you end up removing things constantly while they just sit on your hard drive wasting space...

Continuing my “adventures in” series of model shoot posts, this one is going to be about using a mesh like fabric called tulle in portraits. So what is tulle? Well I’m glad you asked person I just made up so that I could give you an answer to that question. Tulle is a fabric that is usually found in things like tutus or wedding dresses to extend and add volume to them. It’s actually surprisingly cheap compared to similar fabrics out there, only $1.50 per yard at Joann’s Fabric stores. So I ended up getting a bunch of colors as well as black and white to mess around with...

Smart filters are a great way to nondestructively edit your photos in Photoshop. They’re also a fantastic way to keep all of your adjustments and filters organized neatly without having to resort to the chaos that is hundreds of layers laid out in a specific order. In this video I’ll not only show you how to use smart filters, but also compare it to other ways to edit in photoshop and why smart filters are so much better. I go over everything in depth in the video, but if you’re more of the reading type, here’s a simplified version...
Golden hour. Every natural light photographer's favorite word. Golden hour can be a beautiful time that works well for things like portraiture and landscapes. In case you don’t already know, golden hour is the name given to that time period just before, during and after sunrise or sunset where everything has this golden glow to it. It makes for really stunning photos that you otherwise wouldn’t be able to get without faking it in photoshop...
It takes 2-4 weeks to build a habit depending on what the habit is, how long it’s done, your approach and so on. Roughly though, an average of 3 weeks to create a daily habit is a pretty good bet. Here’s the thing though, most people don’t make it through those couple of weeks. There’s a million reasons why, but the hard part of starting any habit is, well, actually sticking with it for the first few days. After those 2 to 4 weeks, those routines you’ve created become an unconscious part of your day. You will no longer have to consciously think about whether or not you did that thing, you’ll just "do it out of habit"...
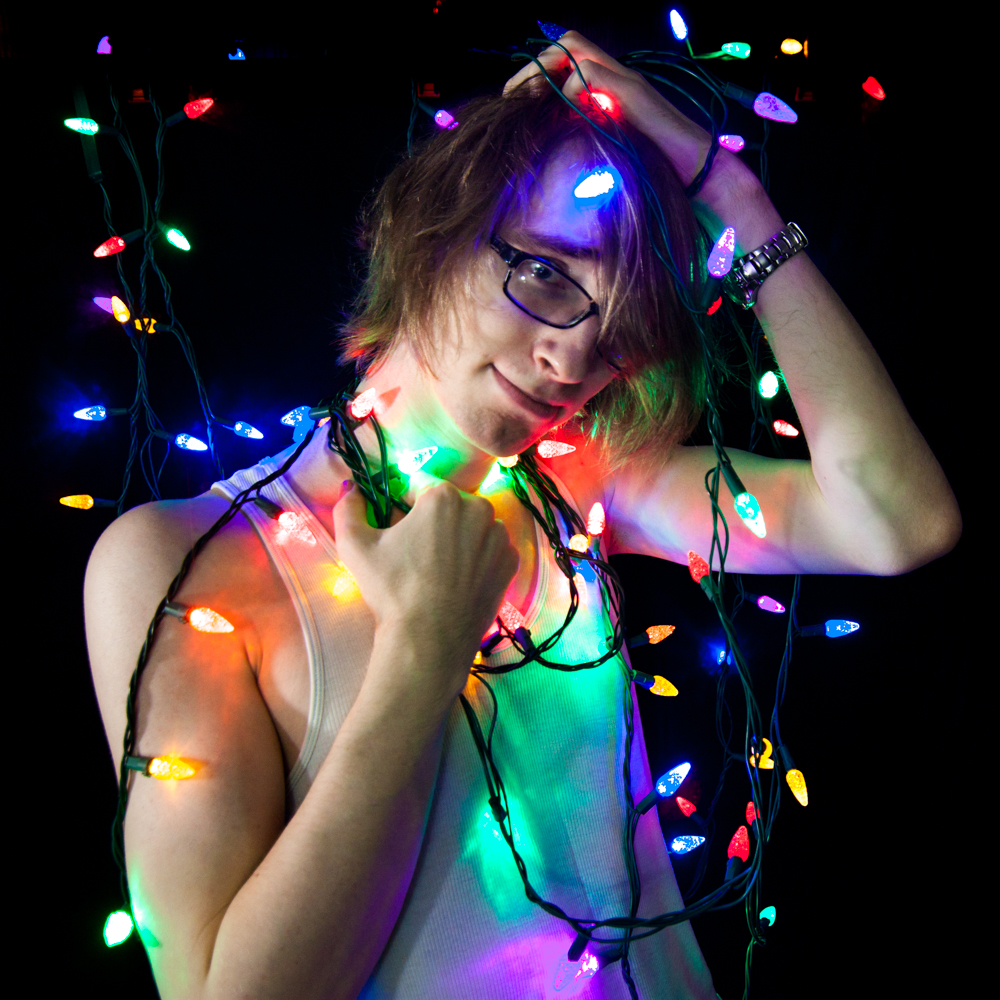
So the holidays are winding down and you’re starting to dismantle your christmas tree and remove all your decorations. Let me stop you before you do that though. There’s a lot of fun, creative photos to be had using those decorations and, specifically, lights. Now there’s millions of things you can do with things like christmas ornament reflections, macro shots and so on, but let's focus on using string lights. Of course, you can use these techniques all year round, but with that “festive” feeling still in the air and the lights conveniently at your disposal without needing to sort through countless holiday bins in your attic it’s the perfect excuse to try them out now...
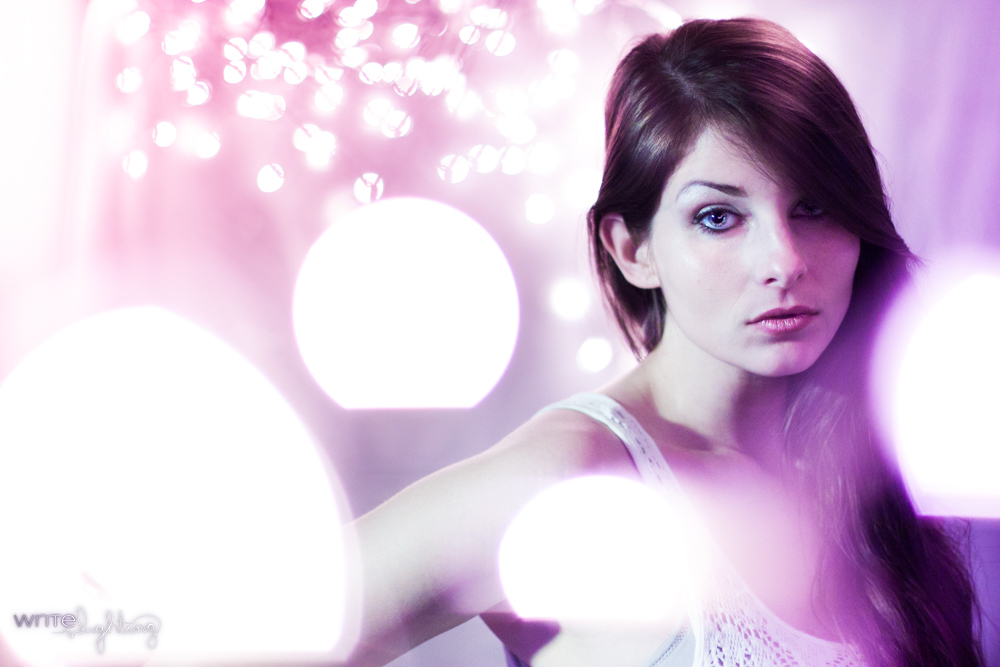
You’ve probably seen those "bokeh balls” on the internet before. You know the ones with lights blown out in the silky smooth background. Well I got together with an awesome model friend of mine and tried out a series of conceptual portraits using christmas lights that utilized the effect. Her idea was to string some icicle lights around a hula hoop and stand in the middle of them for this kind of etherial look. The idea was great, but until we set everything up and tried it out, it actually turned out to not work the way she was hoping it would. Now we could have scrapped the idea and went onto something else, but I knew what she was looking for so I suggested trying a different approach.
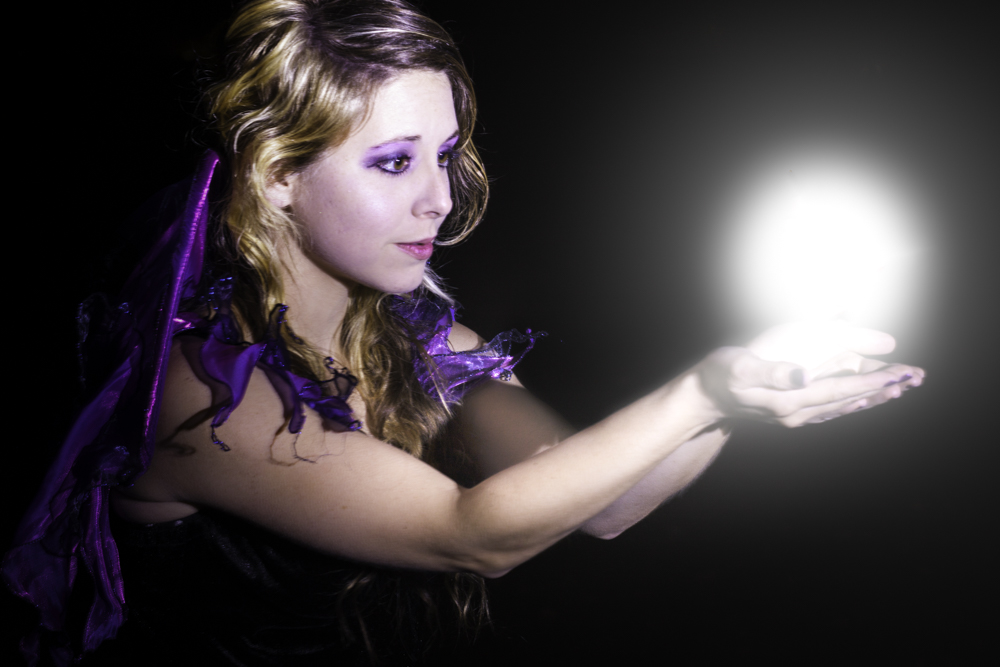
A couple of days ago I did a fun light painting portrait shoot with a local model named Zylina. There were some high points and some low points with the actual light painting bits, but she was a trooper putting up with both me and the cold (HA). When I had first contacted her, I mentioned a couple of different ideas for some shoots and honestly the one I thought the least about was the light painting one. As fate would have it, that’s the option she chose. Eh, it happens. The original photo I had the idea for was this cool shot that I’d still love to do one of these days with underwater lights and such, but in lieu of a light source strong enough that also happened to be waterproof, I had to improvise. She told me the reason she went with the light painting was actually because it sounded interesting and something she’s never done before. The problem here is that it was also the first time I’ve ever done it myself...
So I get a message from a friend of mine and I knew what was coming in the next couple of days before he even asked. He told me that he just bought some more photo gear and he wanted some product shots of them. We've done some before when he bought a Sony A7 and I love any excuse I can get to take photos, so of course I said yes. Last time around we did some more "typical" product shots with very soft flat lighting on a white backdrop using a light box and a couple of lights. Now those are all well and good, but he wanted to go black this time around and we decided to try something different...
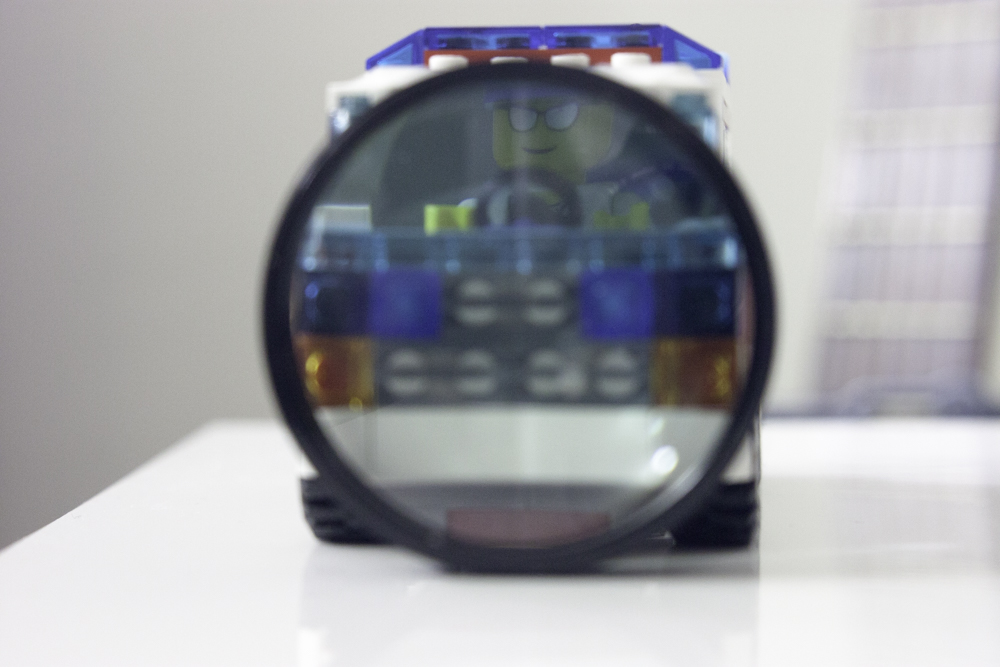
Closeup filters, or macro filters as they are sometimes known, are awesome. They're a relatively cheap alternative to a dedicated macro lens, which not only takes up space in your bag and adds weight, but saves you money if macro isn't a big part of what you enjoy to shoot. You can find sets of these closeup filters for as low as $10 at places like amazon and b&h. Theyre so cheap that even if you've never gotten into macro before, this is a nice, cheap way of dipping your toes in to test the waters. Some people spend a buck or two on an app and get some enjoyment out of it for a little while, this could be your photographic equilivent. ;) Keep in mind that these won’t give you a true 1:1 macro experience...
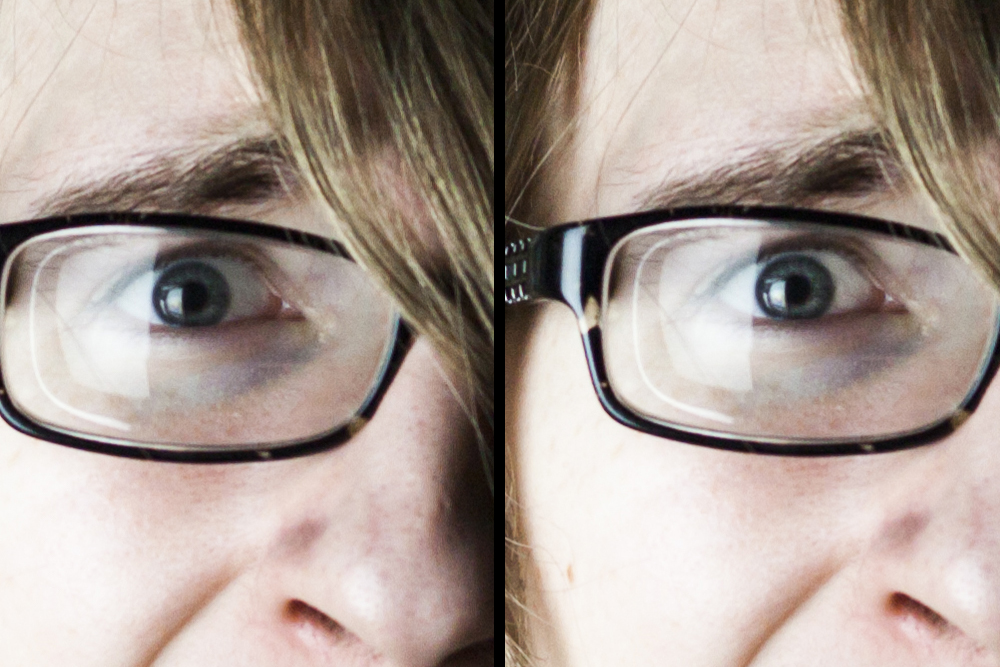
This is a question I see a lot amongst photographers starting out. How do I make eyes pop? There's a decent amount of information out there although a lot of it revolves around not just making the eyes "pop", but making them pop unrealistically. It's a common problem I see where a photograph will have some flat lighting, but then eyes that SCREAM out at you and the dichotomy is quite drastic. I wanted to create a tutorial showing a way to make the eyes match the photo they reside in. I used a dramatic photo in the tutorial, so the eyes are very dramatic. This photo below is a much more common portrait setting and you can see how using all of the techniques I used in the video below can also be applied to something a little more normal just by toning down the settings a bit...

Let me start right off the bat by saying, I never really liked HDR. It was never apart of my vocabulary. I've taken one HDR photo in my entire life before I started implementing this. I just never saw any useful benefits that HDR could provide that a single raw file wasn't more than capable of producing. I was also never a fan of the tone mapped "HDR look" that is ubiquitous amongst so many photographer's work. That's not to say that it's bad or anything, it just didn't fit my style and I honestly never really gave it much of a chance because of that, which is unfair. So I was determined to find a situation where HDR could actually benefit me in some way...
Whenever I need to think, I either go for a walk or I pace around the room. Have you ever noticed yourself doing this? The response i get from people when I ask them this question is actually relatively surprising. I used to think I was a little odd for pacing to help me think or come up with a creative idea. As it turns out, a decent amount of people also found respite in knowing that they aren't the only people who look like they're possessed by a demon who methodically walks endlessly across a room and back. I was curious as to why going for a walk, or pacing back and forth, helps push us forward in a creative direction. At the very least I'd like to know why we think it helps us get out of a creative funk.
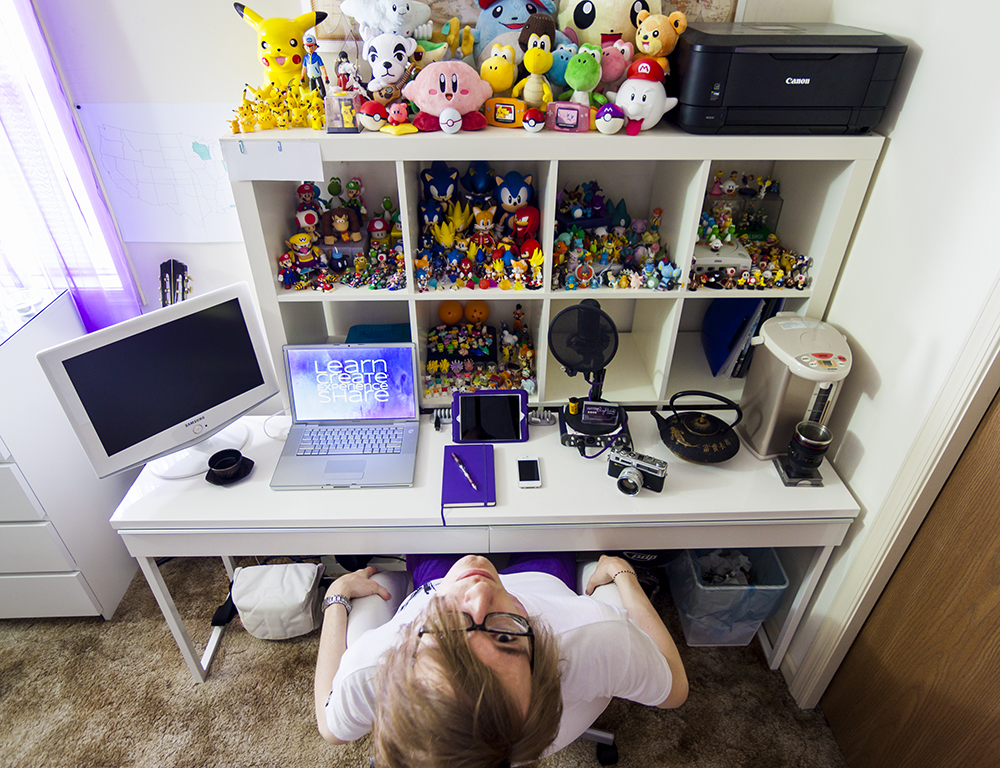
This week's challenge was *puts on National Geographic voice* the artist in his natural habitat. *Ahem* Anyway, the point of this challenge was to photograph me in my surroundings in a way that was indicative of my actual work environment. Basically an environmental self portrait and by basically, I mean that's exactly what it is. Coming up with something other than, 'hey look, a picture of my desk' was a little more challenging than I thought it would be. I had a couple of different ideas in my head of where I wanted to take them, but ended up with mixed results...
Finally, I've brought back the weekly challenge! Yes, I am overly excited about this. I've been planning on doing another weekly challenge for the past couple of months now, but life decided to get in the way everytime the words were even mentioned. Let's put all of that aside though, because I'm planing on doing one of these every week again. It's been awhile, so you might not be familiar with the weekly challenge (I can't blame you). Basically, every week I challenge myself (hence the name) to shoot something that I'm not used to shooting. For example, the challenge might be to shoot a subject matter, like this, that I've never shot before or have limited knowledge of. They could also be more of a concept that gets me, and you, into a more creative mindset and get me, and you, to think outside the proverbial box, like this...
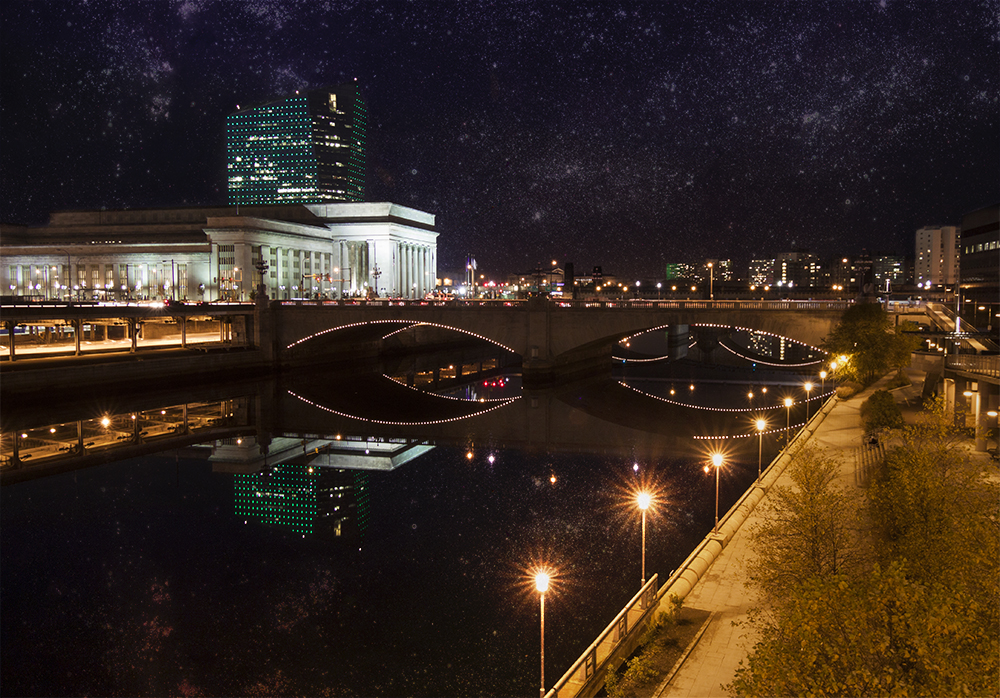
Have you ever seen an awesome landscape scene at night, only to notice that the sky is just a boring black abyss? It seems like everytime I shoot landscapes at night that there's never anything of interest happening in the skies. Not only that, but if its an urban landscape, you'll never see any kind of stars whatsoever due to the light pollution from the city lights. One of the coolest things you can see in the night sky is the Milky Way galaxy. Taking a shot with the Milky Way in it requires a lot of planning and knowledge of how to get it right. Sometimes it's not even going to be possible to get a nice view of the galaxy based on the position of the subjects in the scene...
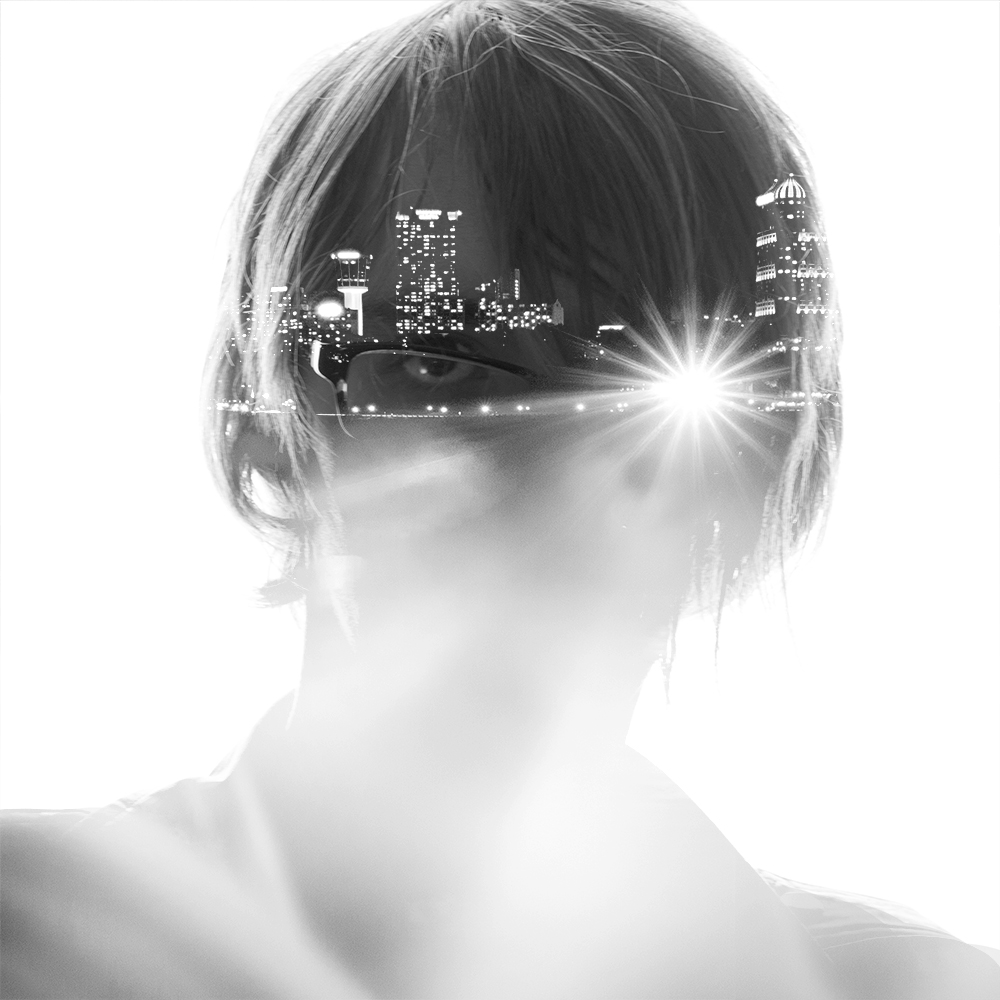
I'm sure everyone has seen one of these photos at least once. Double exposures can be such a fun and interesting creative technique. As the name implies, double exposure photography is all about combining two photos and overlaying them with one another to create a single image. Some digital cameras, and most film cameras, have the ability to take multiple exposures and create the effect in camera without needing any photoshop or post production at all. Personally, I like the ability to control the outcome in a more meaningful way without letting my camera take care of business for me. With photoshop you have many more options on the placement of the two photos, how they're blended together and which elements are showing and which aren't...
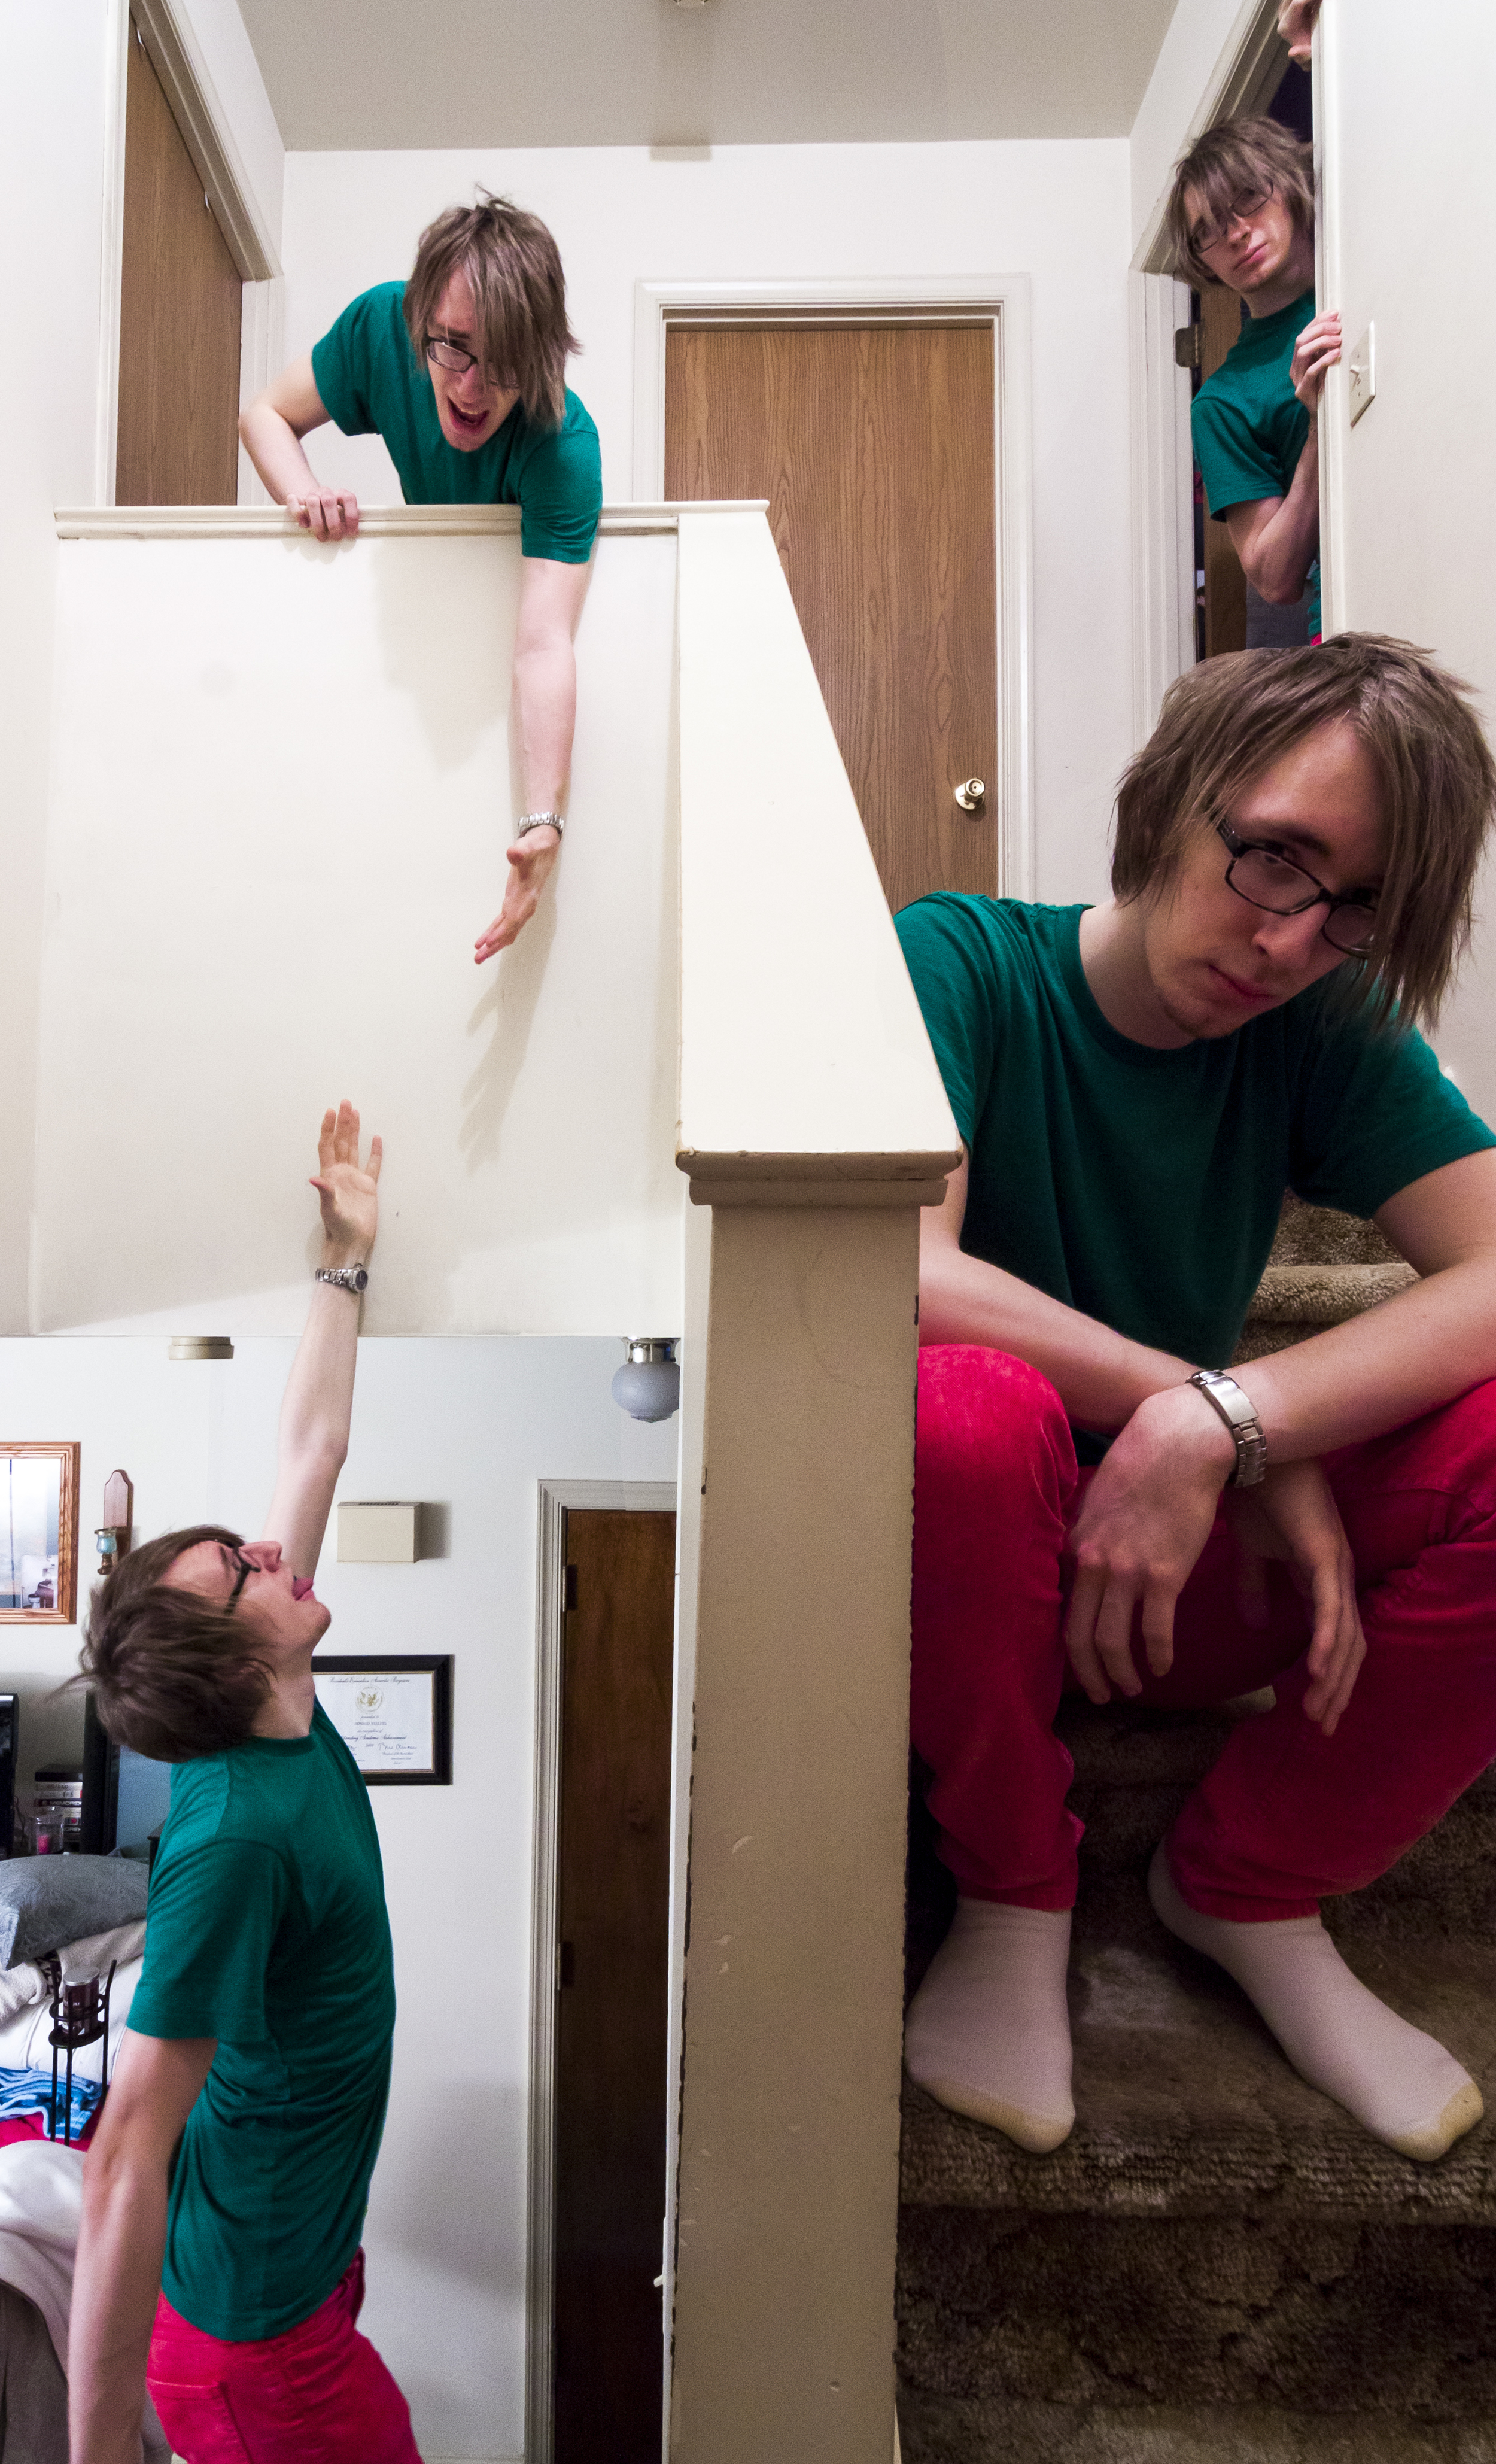
If you follow me on Facebook, you may have seen a clone photo I put up right before christmas. It wasn't meant to be the most amazingly intricate and well composed photo in the world, just something fun to do while I was bored during the holidays. When I was making it, I forgot how fun they are to shoot. I used to make them all of the time years ago and the concept of cloning myself kind of fell to the wayside while I was working on learning new techniques. After I posted it online though, I remembered another thing about multiplicity photos. There's a lot of people who love them and a lot of people who still aren't sure how to make them for themselves. So, I decided to make a tutorial explaining how to not only set up the shots to make your life easier, but also how to composite them in post to get the final image...
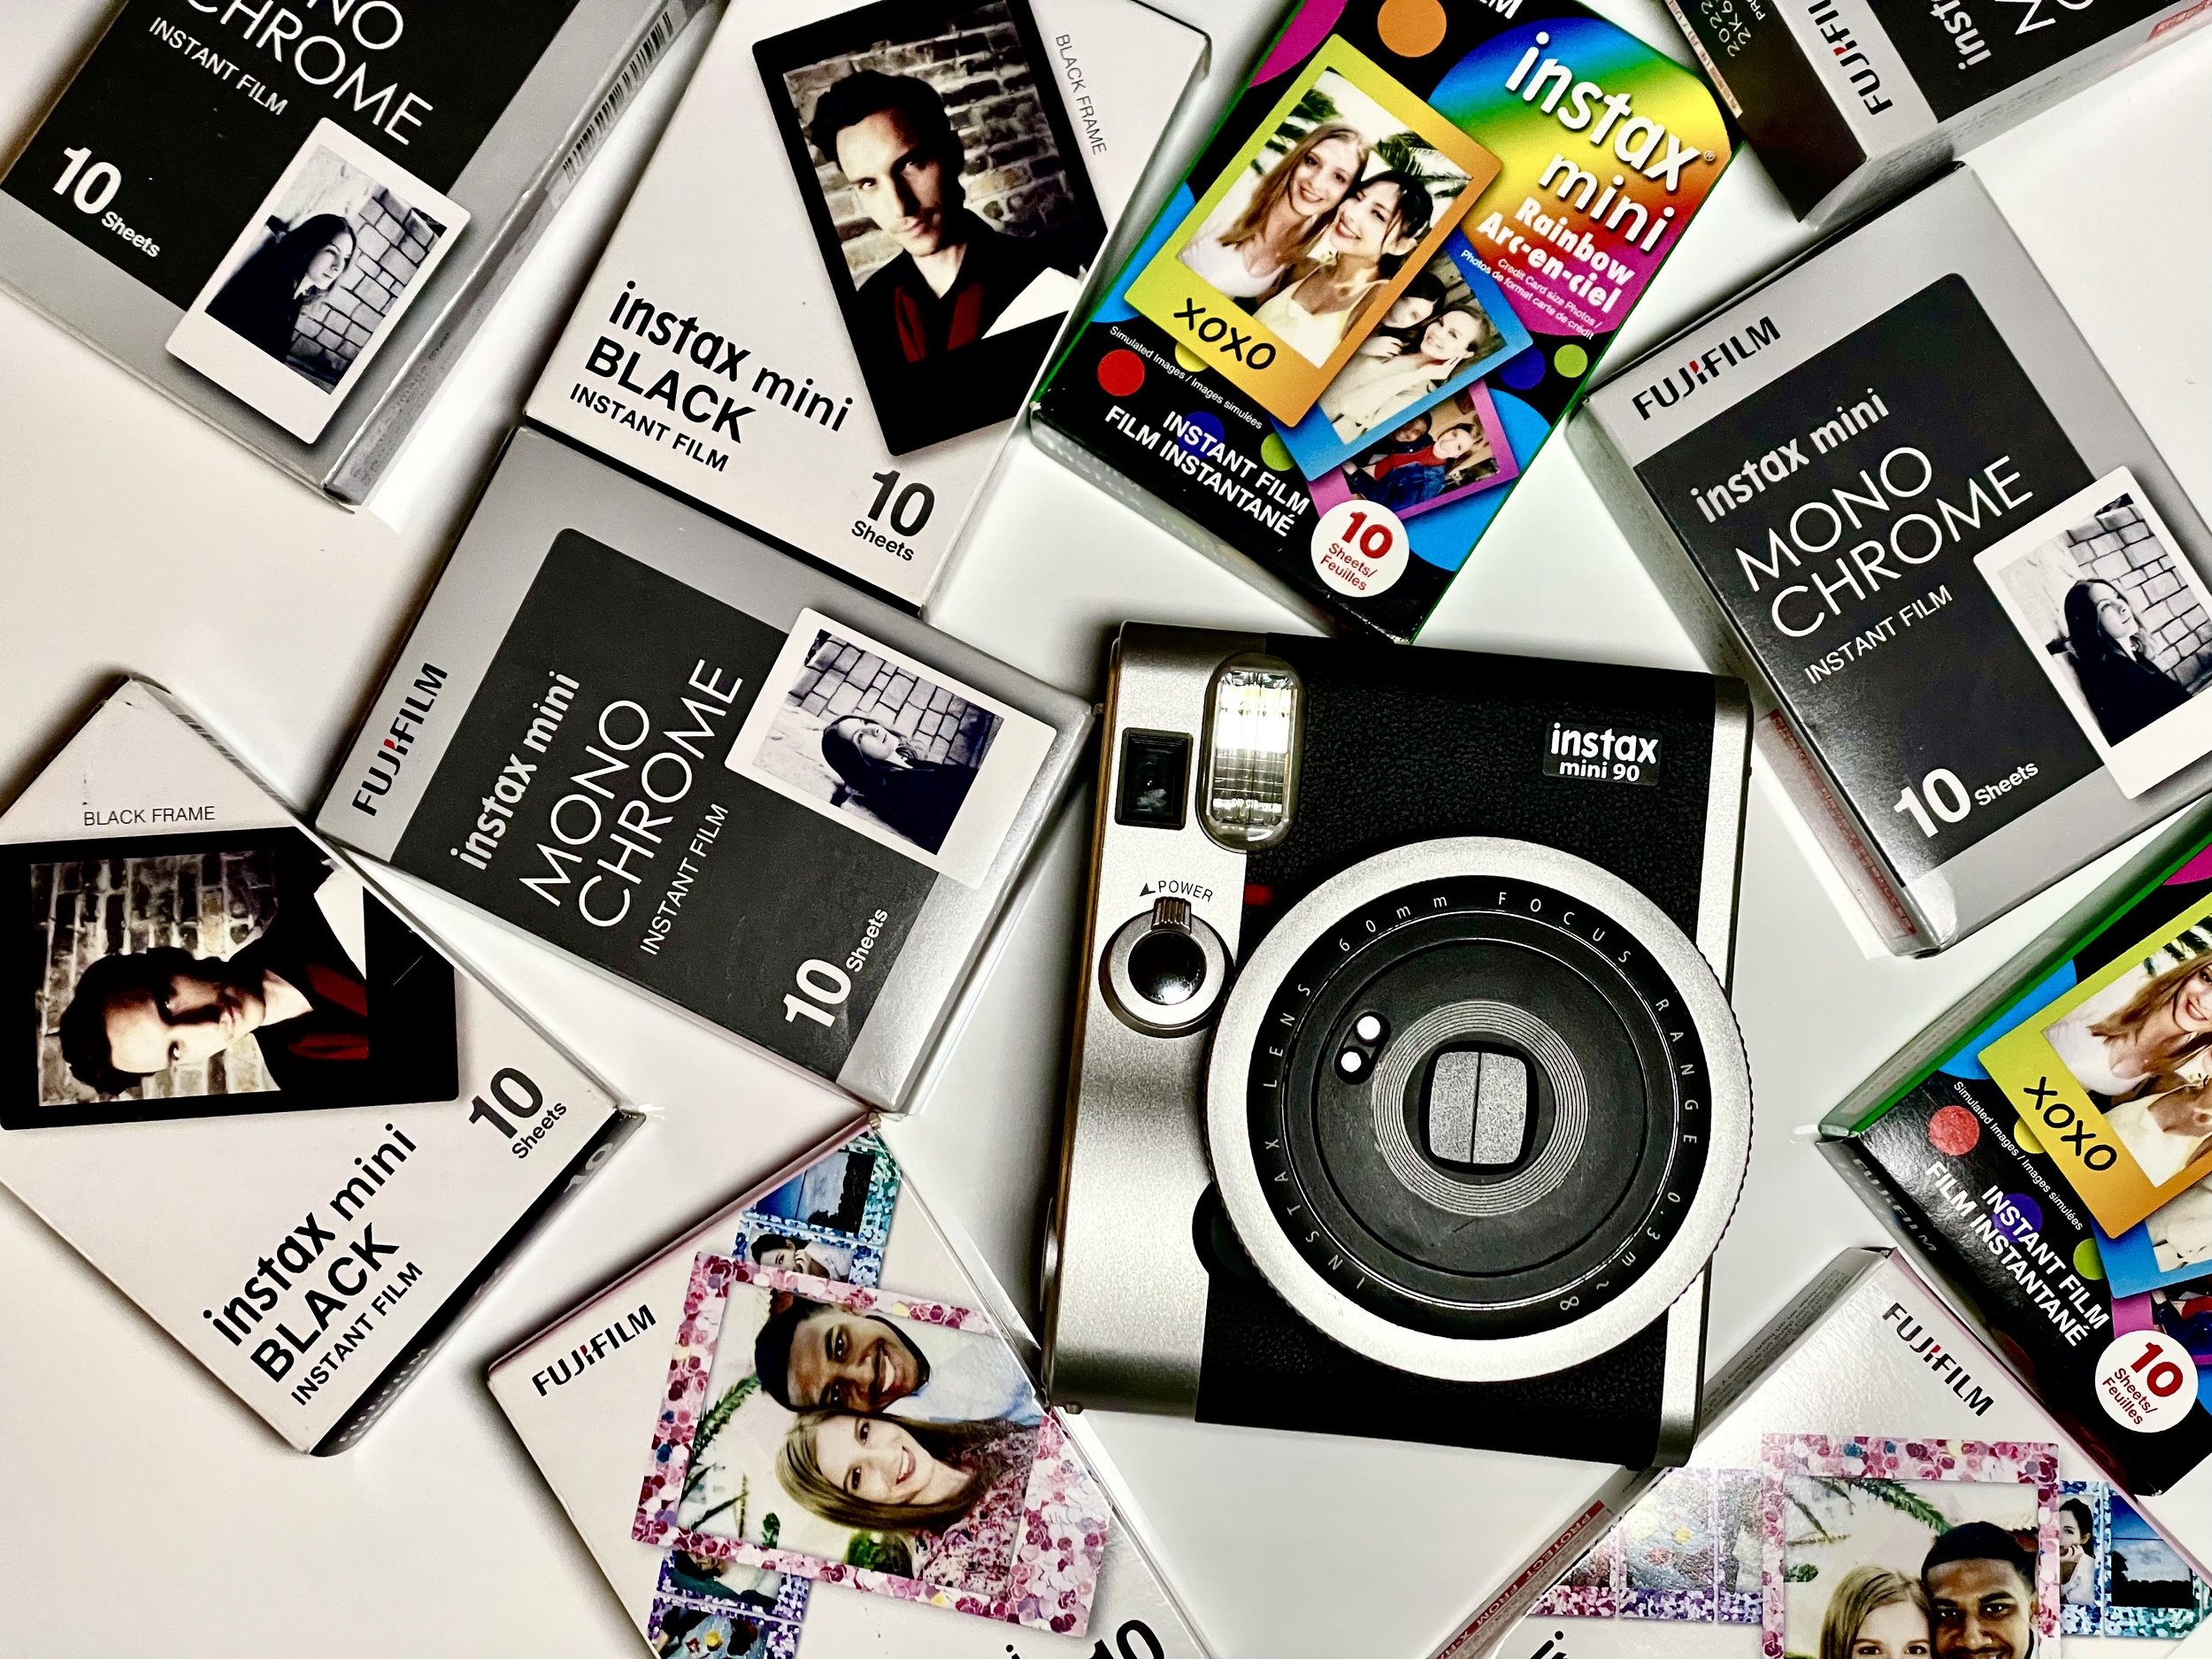
It’s not the most unique idea in the world. Plenty of others have done some form of a, “do something every day for a year” project. I can’t say in absolute terms if anyone has tried a, “document what’s important to you that day every day for a year by way of Instax film” project before. It’s not about creating a radical new idea that will revolutionize the universe. I wanted something simple yet meaningful that I could do every day to bring a little joy into my life.